Introduction to Gas Cooktops
Gas cooktops offer precise temperature control and quick heat changes, preferred by many chefs and home cooks. They come in different types like freestanding units or built-in cooktops designed to fit existing cabinet cutouts.
This guide will navigate you through each step of gas stove installation, from selecting the correct connector to safely detaching your old cooktop and conducting leak tests. While illuminating key steps for DIY enthusiasts, we will also provide guidance on when to seek professional help for your gas cooker installation.
If it’s time to enhance your culinary prowess by installing a new gas stove that allows for meticulous heat control, read on to ascertain the appropriate installation techniques.
Preparing for Installation
Preparing adequately before installing a new gas cooktop is crucial. Start by verifying with your local council any required regulations or permits for gas appliance installations.
Ensure you arrange a licensed gas fitter for the gas connections as part of the installation process. DIY installation can be complex, potentially illegal and unsafe without proper qualifications.
Before embarking on the task, it is pivotal to Make sure to measure your space accurately against the new cooktop’s dimensions to ensure it fits. Also confirm the gas type, ensuring compatibility with your existing cut lines, as natural gas or propane gas connection models differ.
Use a soft pencil to mark where the stainless steel cooktop can be trimmed to fit your new freestanding or slide-in unit. It’s also necessary to purchase quality materials in advance, ensuring you have the correctly sized flexible connector and suitable adapters.
Turn the gas cock off to stop the gas supply, and shut off the power at the circuit breaker before initiating the replacement process.
Required Tools and Materials
The right tools and materials, such as a reliable screw connector, are essential for a successful stove installation:
- 1/2-in. flexible appliance connector marked for 'range’ use
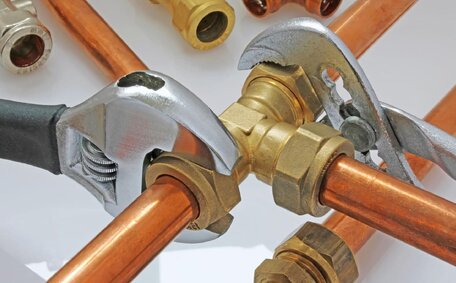
- Adjustable wrenches
- Yellow Teflon tape
- Pipe joint compound
- Gas leak detector
The flexible connector should be compatible with both your water heater’s end fitting and the size of your gas connections. Wrenches allow tightening where fittings need securing, while Teflon tape and compound seal threads. A leak detector is vital for checking all connections before turning the gas back on.
Quality gas stove installation materials are available at trusted home appliance centers. Avoid old stock or makeshift parts not designed for gas appliances. Always use the right tools and new, undamaged materials to prevent leaks and other hazards.
Removing the Old Cooktop
Safety is paramount when removing your old gas cooktop. Ensure your and others’ safety by turning the off gas supply valve and unplugging any electrical lines before commencing.
Begin by proceeding to take out any brackets or screws holding the cooktop, ensuring you’ve got every component detached from your existing counter or cabinets. Carefully pull the unit forward, disconnecting any gas lines or electrical connections in the back. Immediately seal the open gas line with an appropriate end connector or pipe plug to avoid leakage.
As you disconnect the old gas line, make sure to support any hanging pipes to prevent extra stress on fittings. Coil up and securely store any usable extra length of gas pipe off to the side for later.
Double-check that all connections are detached before lifting the cooktop. Carefully lift the appliance straight up and out, being mindful of the rear vent opening and any nearby cabinets or walls. Place the old one in a cleared, protected area while you set up the space for the new one.
Hiring a gas fitter to clean the cutout space ensures a safer stove installation. Vacuum any debris and use a degreaser on the empty space to ensure a clean area for your new stove. Ensure the opening meets the manufacturer’s recommended minimum clearance dimensions for your cooktop model.
Ensuring Proper Fit and Clearances
It is essential to verify that your new gas cooktop fits the existing cutout space, accounting for line shutoff space. Refer to the installation manual to find The required clearances from combustible surfaces like cabinets or walls, usually a minimum of 30in x 34in. For the majority of models, you’ll need to ensure there is more than a minimum of 30cm clearance on each side and at the rear.
The depth must allow brackets to secure to the base cabinets, and check your measurements to ensure room to line accommodate the gas and electrical connections in the back.
Additionally, assess the clearances between your cooktop burners and any overhead appliances, as these may vary depending upon individual models. Typically a 65cm vertical gap is recommended, but this can vary. Insufficient spacing is extremely dangerous as it risks flammable vapours collecting underneath.
Measure precisely and ensure the cooktop dimensions fit before installation. The front edge of the cooktop should align with or be marginally higher than your countertop’s edge. If it extends past the front, fails to align evenly, or has insufficient clearances around and above, proper installation won’t be possible.
Connecting the Gas Supply Line
Precision is essential when connecting the gas stove to the existing gas supply to prevent leaks. Start by ensuring the gas shutoff is engaged at the gas line shutoff valve. To ensure a tight seal, apply pipe joint compound to gas fittings and Teflon tape to flare connections.
The flexible metal appliance connector gas fitting attaches between the chef gas cooktop and gas line. Ensure the connector is sized appropriately and marked for use with cooking ranges.
Tighten this securely using two wrenches, ensuring right angle pipe positioning to achieve a gas-tight seal. Test for leaks by brushing on a soapy solution.
Slide the cooktop into place, aligning for hooking up the back gas port with the protruding gas line or appliance connector.
During hookup, meticulously align the cooktop to avoid bending or kinking the connectors. Securely fasten all fittings before restoring gas flow. Then fire up gas flow and ignition test every burner to verify proper function.
If you’re not qualified, hire a licensed gas professional for safe gas cooktop installation. Improper connections can lead to hazardous gas accumulation and fire risks. Safety should remain the top concern during installation.
Checking for Gas Leaks
After installing the new gas cooktop and connecting all fittings, it’s crucial to thoroughly check for potential gas leaks. Use a leak detection spray or electronic gas sniffer to test connection points.
Apply a soapy water solution with a brush to test the cooktop’s gas line, connector, valves, and joints for any leaks. Slowly open the gas valve to pressure test while watching soap bubbles that would indicate escaping gas. Dry the fittings thoroughly after testing, before restoring full gas pressure.
Also check inside the cooktop base cabinet by using a mirror to inspect below and behind. Leaking gas tends to pool in enclosed spaces, creating extreme danger. If any leaks are detected, immediately turn off the gas and contact your local gas company to safely fix before continuing.
Final Installation Steps
After connecting the gas supply and ensuring no leaks are present, finish off the installation by:
- Securing the cooktop to the counter or cabinets using the provided brackets and screws
- Plugging in the electrical cord or connecting the unit to the power source
- Testing that all knobs and controls operate properly
- Igniting each cooktop burner to verify full functionality, proper flame height, and even heating
Consult the user manual for resolutions, especially when addressing lever knob errors or burner ignition issues. For freestanding cooktops, check that the unit sits level and does not wobble.
While basic securing and testing may be DIY-friendly, Consider hiring a professional to install the cooktop and guarantee safety and compliance.
Verifying Compliance
After completing the installation of a new gas cooktop, it’s crucial to obtain a compliance certificate verifying that all work meets all required safety standards. In Australia, this involves adhering to AS/NZS 5601 Gas Installations regulations.
A licensed professional will ensure proper clearance from combustibles, venting, gas pressure, and leak testing among other aspects. Photos of the finished job may be taken. You’ll receive an official certificate stating the work complies with local building codes and regulations.
If a certificate was not obtained post-installation, contact a local gas professional for inspection and certification.
Operating and Maintaining Your Gas Cooktop
After installing your new gas oven and its cooktop, familiarise yourself with the proper steps to ignite the burners before cooking. To ignite the burners, press and turn the control knobs while using a lit match at the corresponding burner. For those with a wok burner, adjust the knobs to attain a steady flame that is compact for simmering or extensive for avid boiling or stir frying.
Clean grates, burners, and drip pans regularly with warm soapy water and a soft cloth when cool. Use a diluted white vinegar solution to remove stubborn residue. Confirm that the burner flames remain even and brightly blue, not the flickering yellow of a black gas pipe issue requiring adjustment.
Regular inspections of the flexible gas line are important to ensure the integrity of space your cooktop occupies is maintained. Organise annual checks by qualified technicians to identify leaks early and maintain efficient, reliable cooker performance.


